

Record what you spent
- Tap plus, then Expense.
- Choose the date, enter Amount spent, and add Fee / withdrawal charge (optional) if applicable.
- Optionally enter What was it for? (optional) and select Paid from account.
- Check the currency and choose the funding bucket, or choose No bucket to spend available unassigned money.
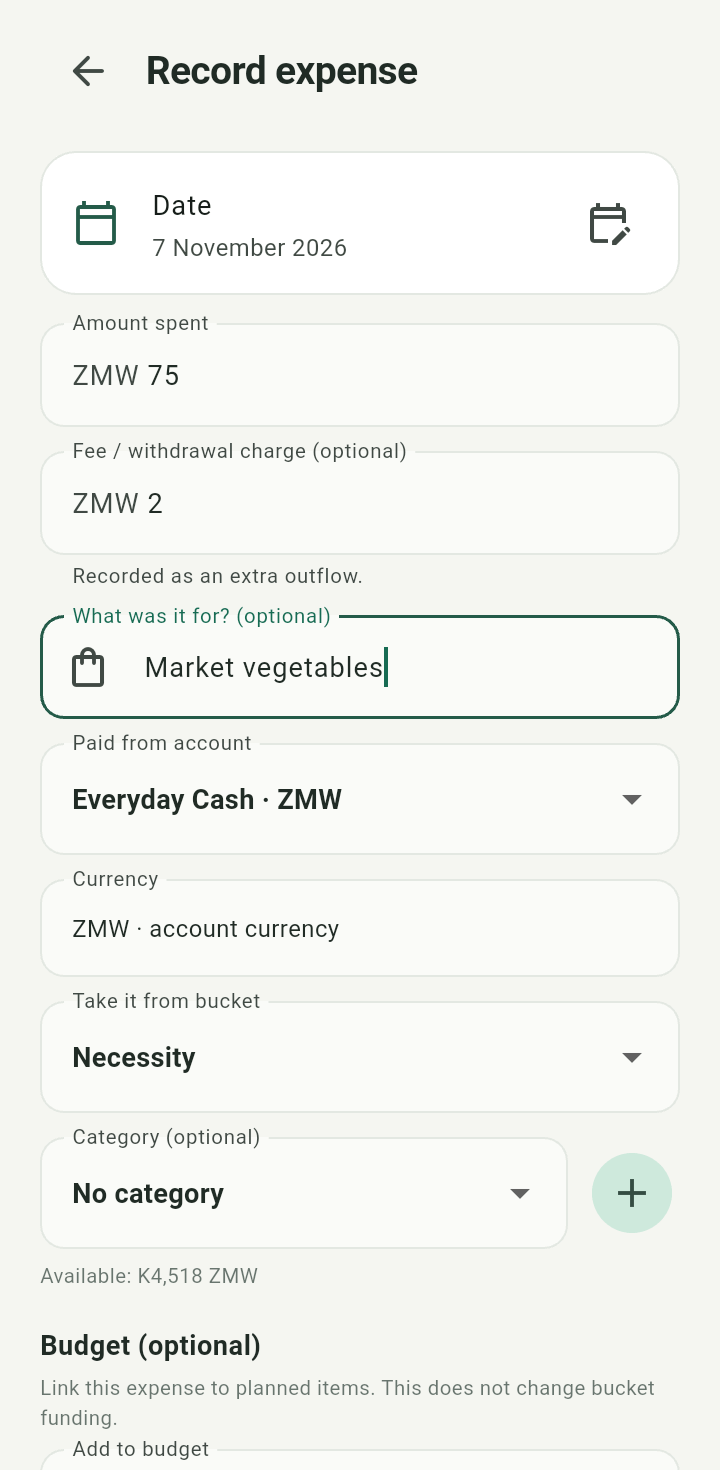
Record expense form with amount, fee, item, account, and currency
The amount plus fee must be covered by that bucket in the selected currency. With no bucket, unallocated money must cover it. These existing spending checks can reject an entry; an account balance alone does not establish bucket funding.Categorize the purchase
Category (optional) describes the type of expense, such as Groceries or Transport. It is separate from the funding bucket. Use the new-category action to enter a Category name, then tap Add.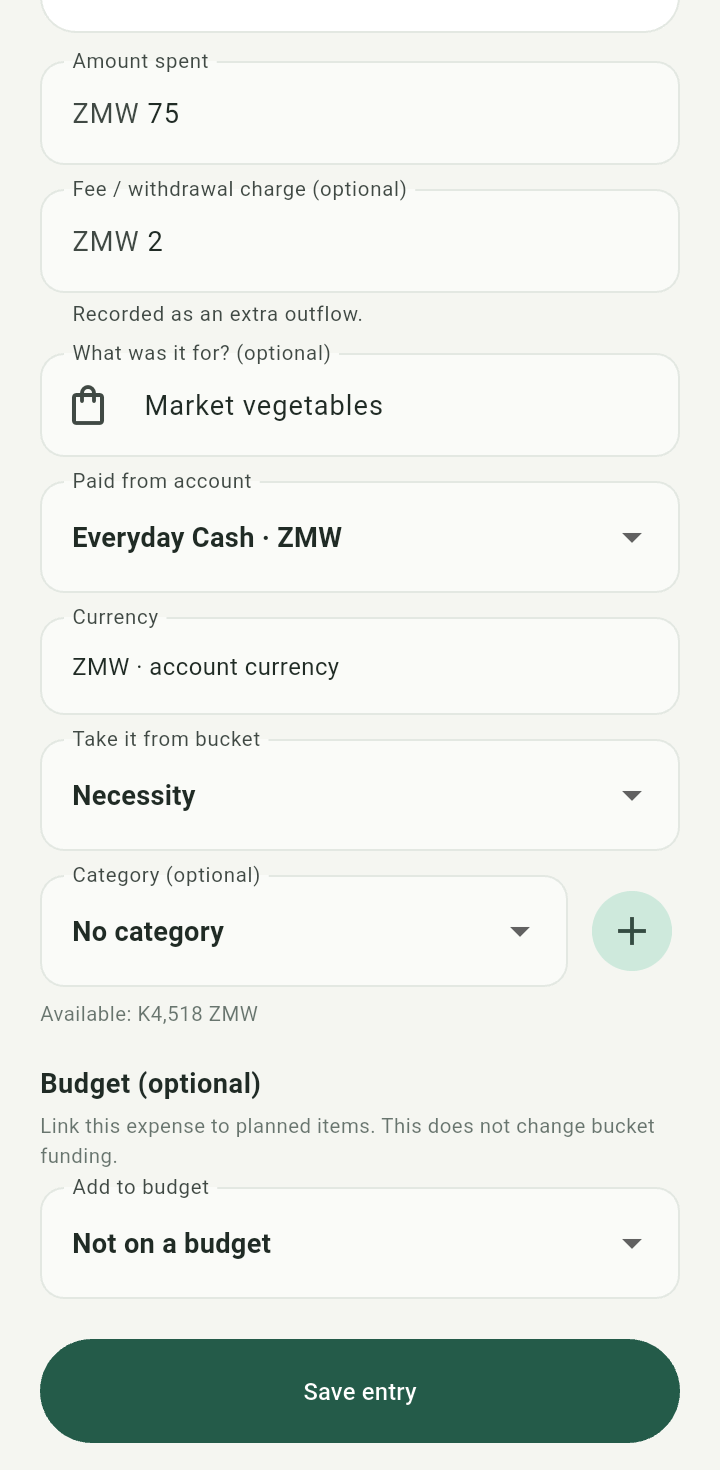
Expense funding bucket, optional category, and budget controls
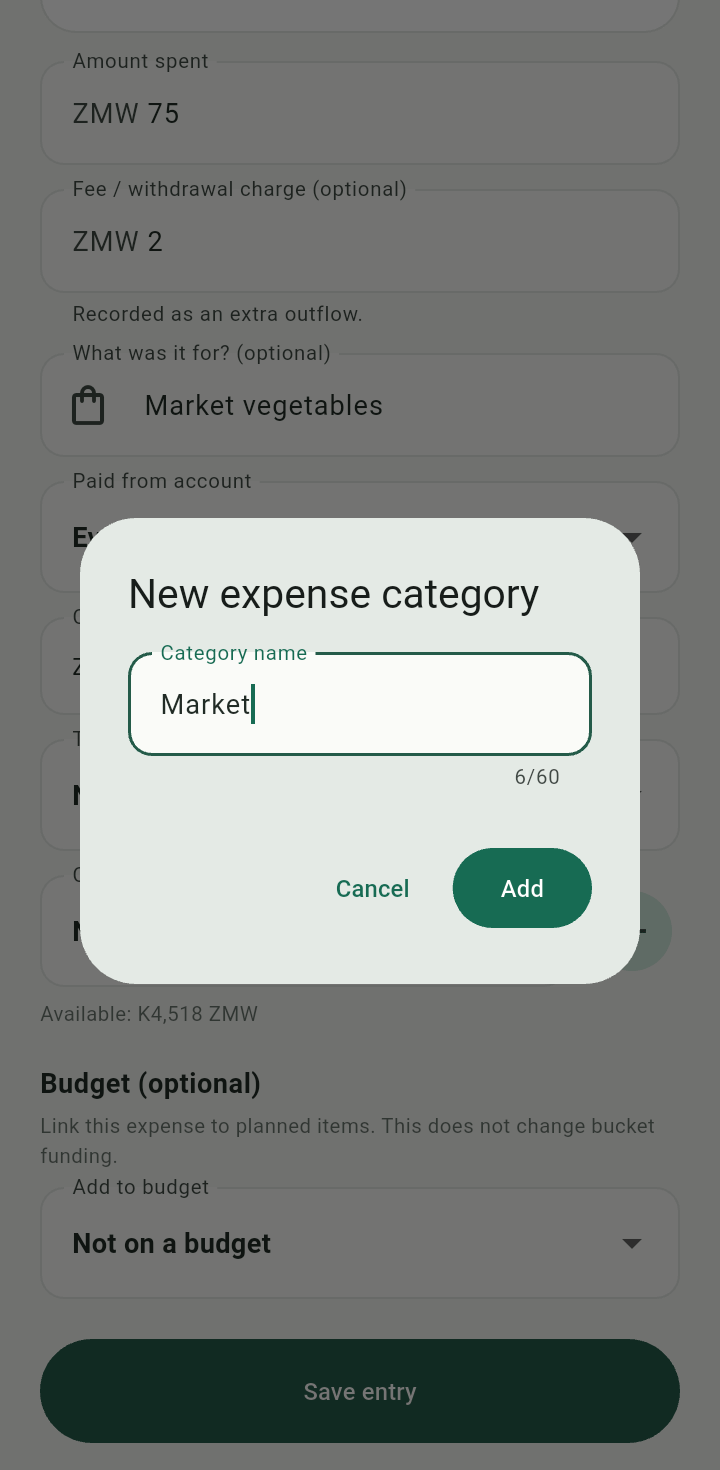
New expense category dialog
Link a budget and save
If a budget covers this date and currency, optionally choose Add to budget and enter item amounts and quantities. See tracking purchases. Tap Save entry. Check the saved entry and updated balances.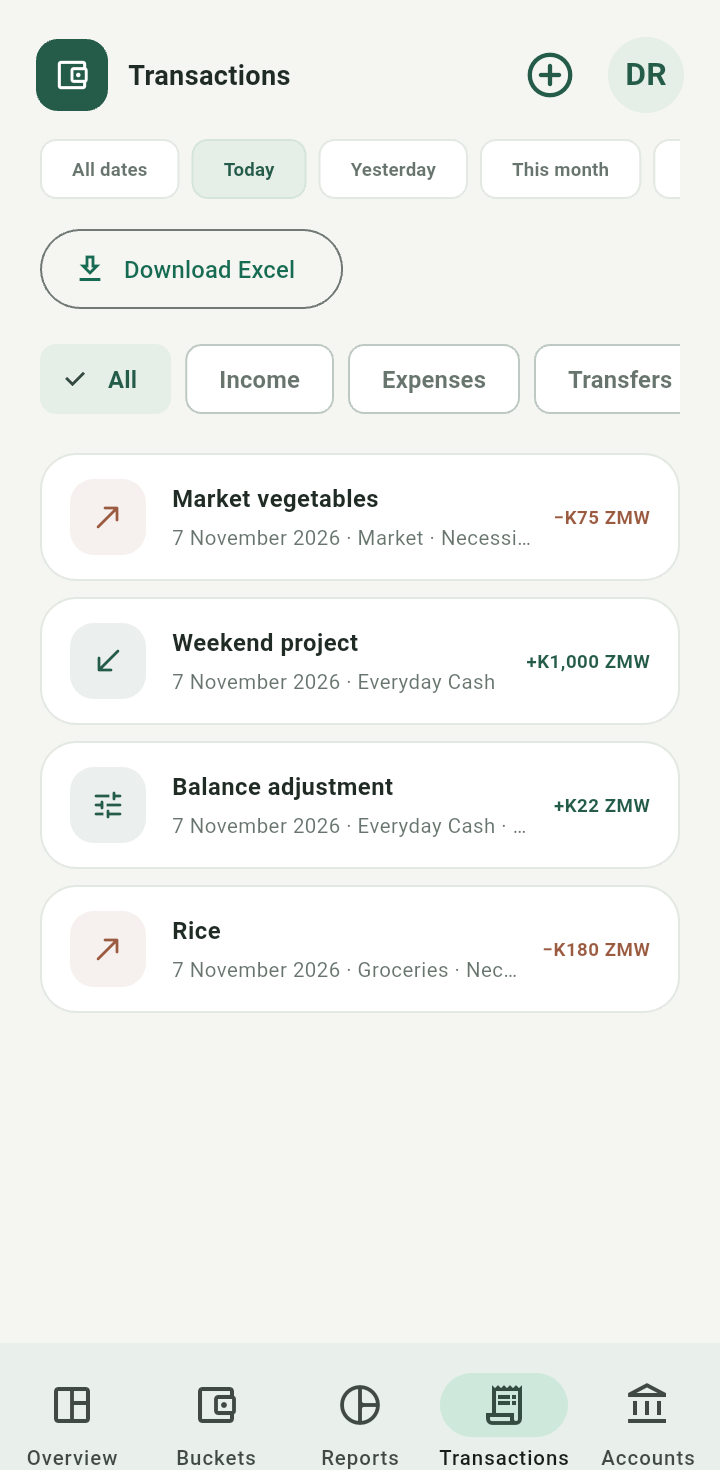
Saved demonstration expense and fee in Transactions
The fee is part of account and bucket outflow. Budget item allocations apply to the purchase amount, excluding the fee.